Our clothing system for fast and light travel was inspired by our clothing system for mountaineering. When designed correctly, it can be adjusted to cover any temperature range, from sub-zero to tropics, and any weather condition, including snow, rain, sun, etc. The one thing it doesn’t do is look particularly fashionable, fancy, or glamorous. That doesn’t bother us too much, as you probably will have noticed by now. The important thing is that it makes more adventuring possible.
We have a few ground rules:
- Layer, layer, layer. The components of any system should be mix-and-matchable to accommodate all of the reasonably likely weather conditions above.
- If you can’t wear everything in 2 days, you’re probably packing too much.
- No cotton. Stick to synthetic blends that breathe well and dry quickly.
- Just spend the cash on the good stuff. And by good stuff I mean technical, light, compressible, packable, quick drying clothing and fabrics. You’ll only need to buy 1-2 and they’ll last a long time.
- Get yourself some Campsuds(Amazon) and a universal sink plug(Amazon).
Here’s how it works. On any given day, we wear an outfit. At night, we strip off anything that needs to be cleaned and wash it with Campsuds in the sink. (Campsuds(Amazon) is biodegradable and will clean clothes, dishes, face, body, hair, etc). Not all places you stay will have a convenient sink for this, so we bring a universal sink plug(Amazon) everywhere we go. In a pinch, a 1 gallon plastic bag, bucket, or any plastic container that holds water will work. Then you hang them out to dry. By the time you wake up the next morning, your clothes should be clean, dry, and ready to wear again. (IMPORTANT: This system will not work if you do not have quick-dry clothing. Make sure you get some intelligently designed fabrics and test this out at home before heading out into the world! Cheap, everyday clothing alternatives simply will not do the job in most cases and you will pay for your mistake. And if you do find yourself with wet clothing in the morning for some reason, the most efficient way to dry it is actually on your body. You’ll have to suck it up, put it on, and you’ll usually be dry and happy in under an hour.)
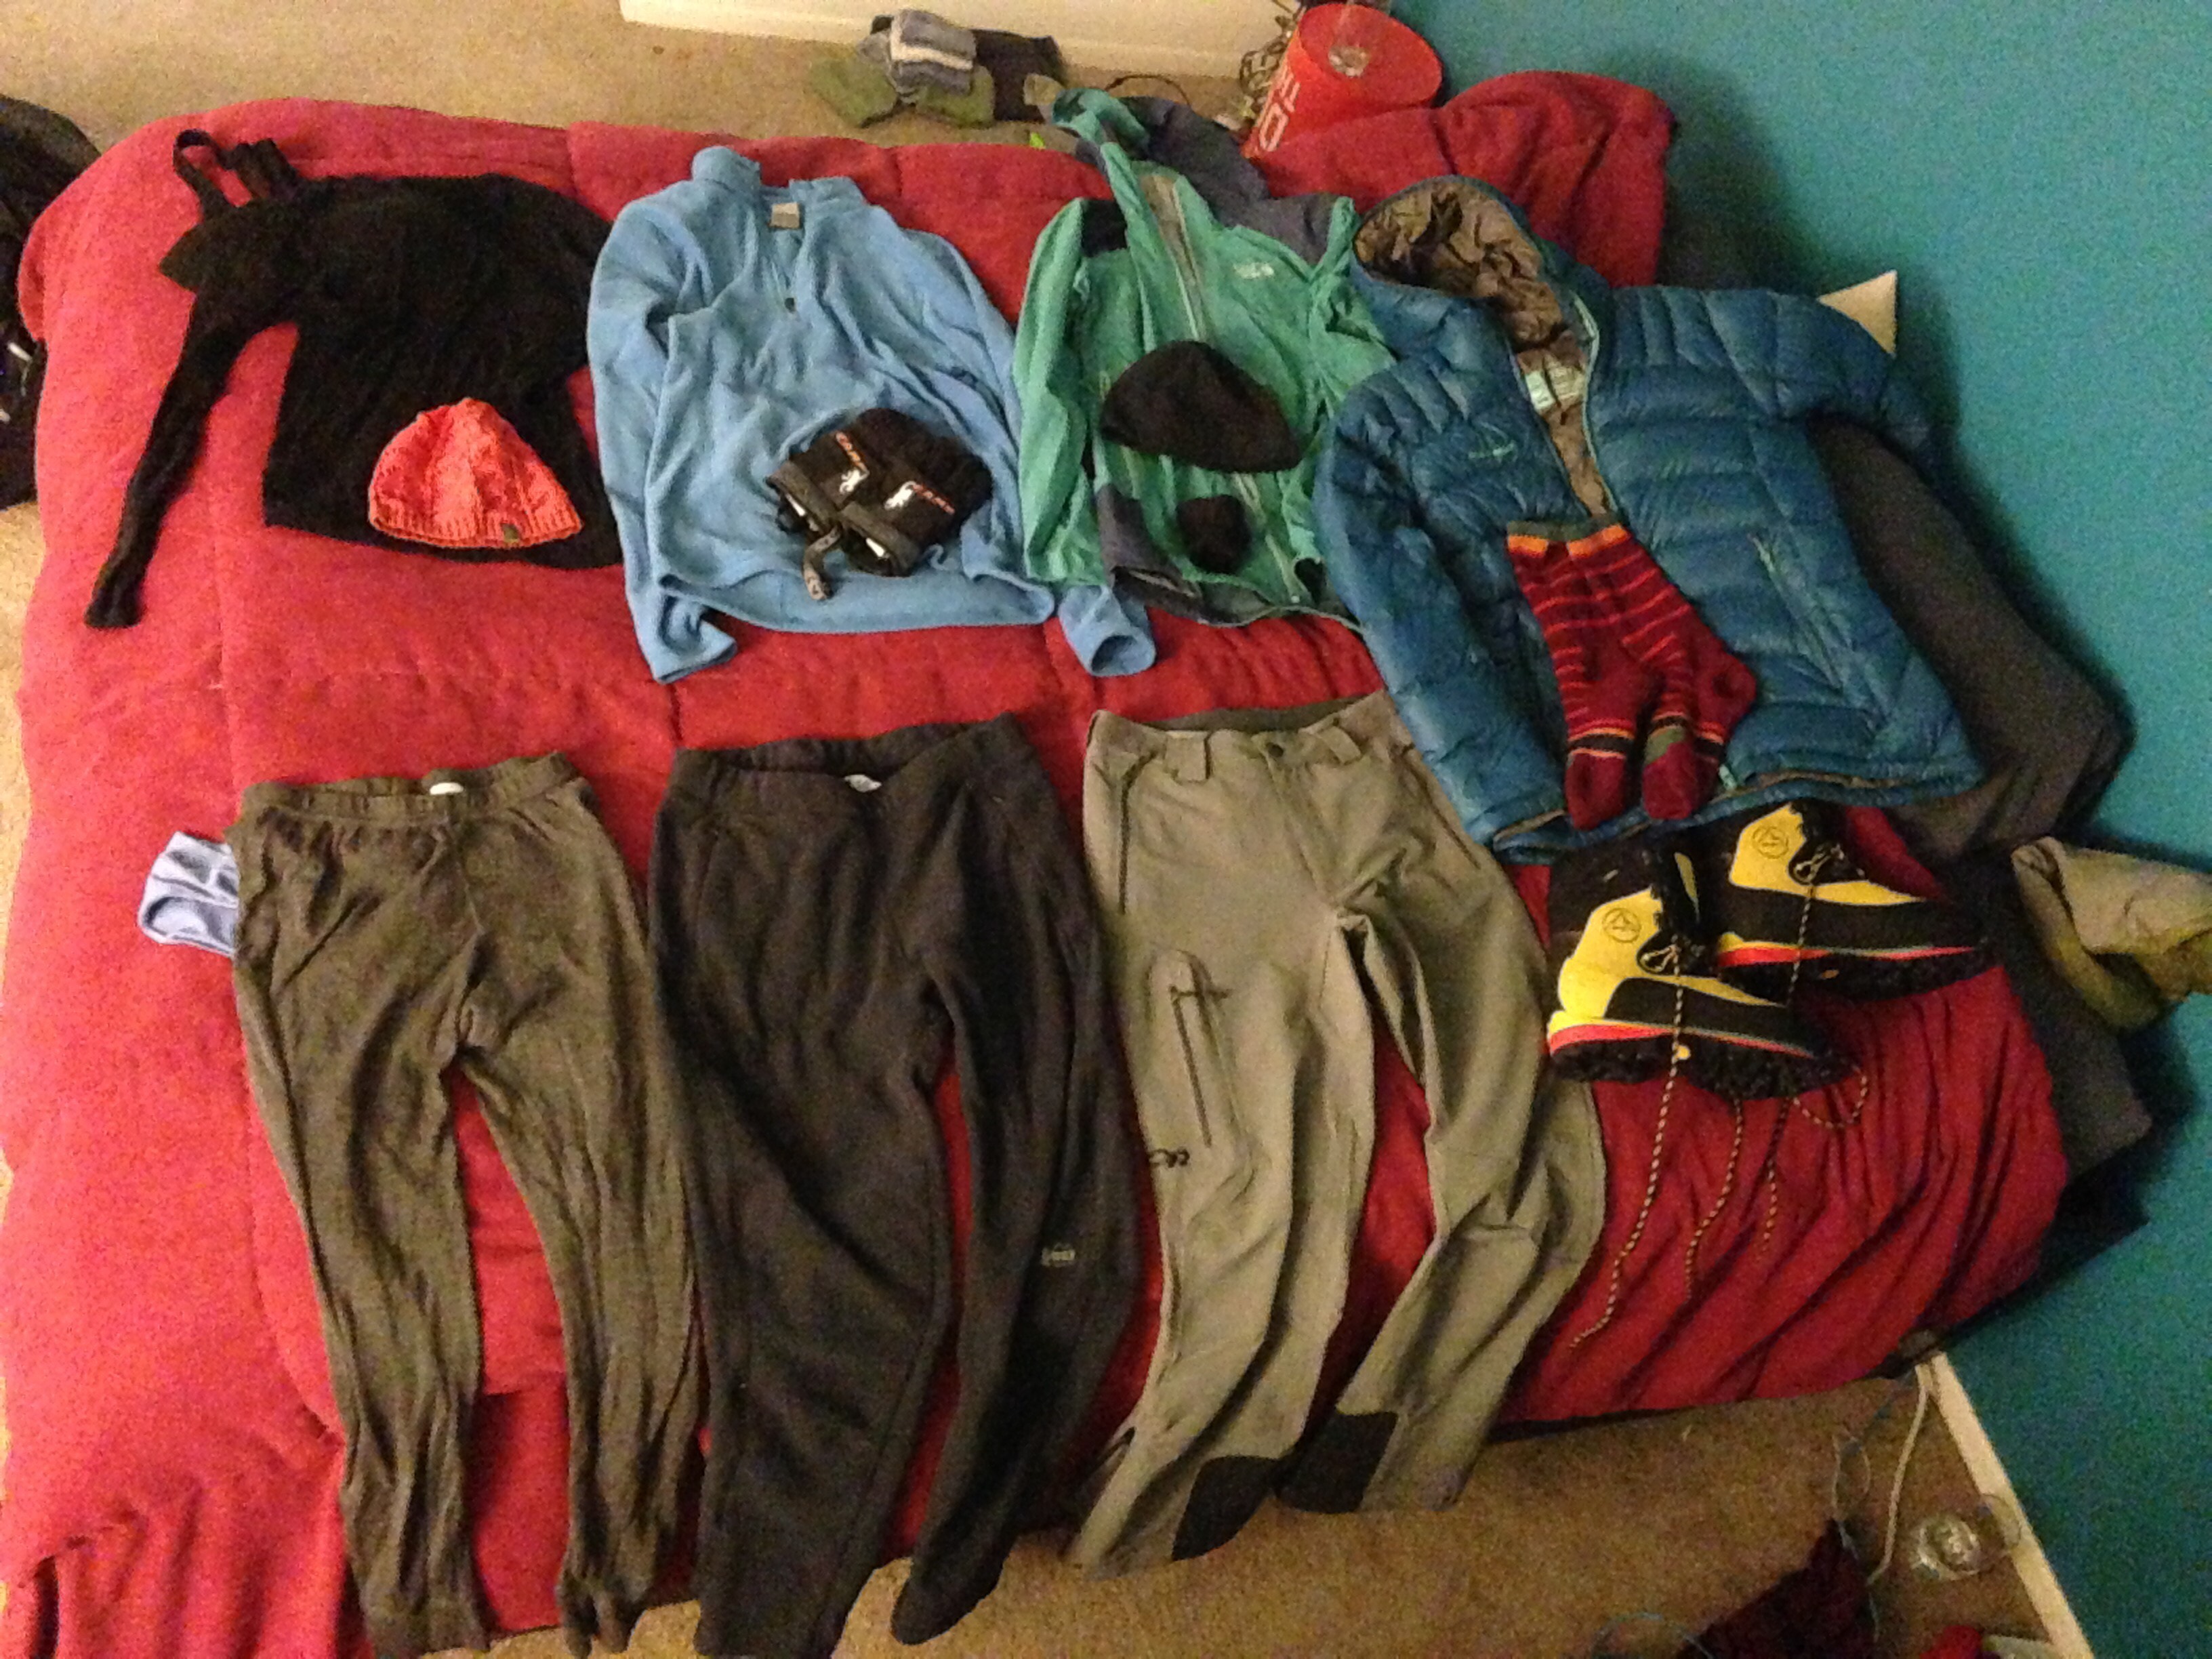
Layering system
- Undergarments- These should keep you clean and fresh and be easily washed.
- Quick-drying sports bra, if applicable, like TNF’s Stow-N-Go(Amazon).
- 2 pair technical underwear. I prefer Patagonia’s Barely Bikini(Amazon).
- Base – This layer provides warmth, insulation, and next-to-skin comfort. They’re also great as pajamas. Items in this category can include:
- 1-2 Quick dry tees, like these from Patagonia(Amazon). I like finding shirts that aren’t obviously athletic shirts so I can blend in in the city a bit better.
- 1-2 long-sleeved base layers, like these(Amazon). You can’t go wrong with black. It can be dressed up or down, depending on the occasion, and look nice in a restaurant if necessary.
- 1-2 synthetic base bottoms, like these(Amazon).
- Mid-layer- This is an insulating layer that should be relatively breatheable. It can include:
- 1 fleece shirt, like this(Amazon)
- A softshell jacket, like this(Amazon)
- 1 long-sleeved sun(Amazon) or bug shirt(Amazon) (optional)
- 1-2 pair of pants. I prefer zip-offs like these by Prana(Amazon). If there is no chance of wearing shorts, you can skip the zippers and buy any climbing or hiking pants that work for your body shape and needs.
- Insulating layer- This may or may not be applicable, depending on the climate you are travelling to. Make sure these pack down small, preferably into their own pockets, otherwise the volume will overwhelm your 40 liters.
- Down jacket (highly insulating, compressible, and fairly light. The higher the fill power (fp) is on the jacket, the more space- and weight- effective it will be. Also, the more expensive. Josh and I like Mammut and Marmot, and some of our friends have really liked Patagonia.)
- Synthetic insulated jacket (e.g. Thermoball(Amazon) or similar)
- Shell layer- This layer protects you from external conditions such as wind, rain, snow, etc. You won’t use this all the time, so it is best if it is easily packable, preferably into its own pocket, and light. Skip heavy zippers, buttons, and fabrics.
- ultralight rain/wind jacket like this(Amazon).
- ultralight rain pants (optional)
- hat for sun protection (preferably easily packable)
- hat for warmth
- gloves (synthetic base and/or waterproof shell, depending on your travel goals!)
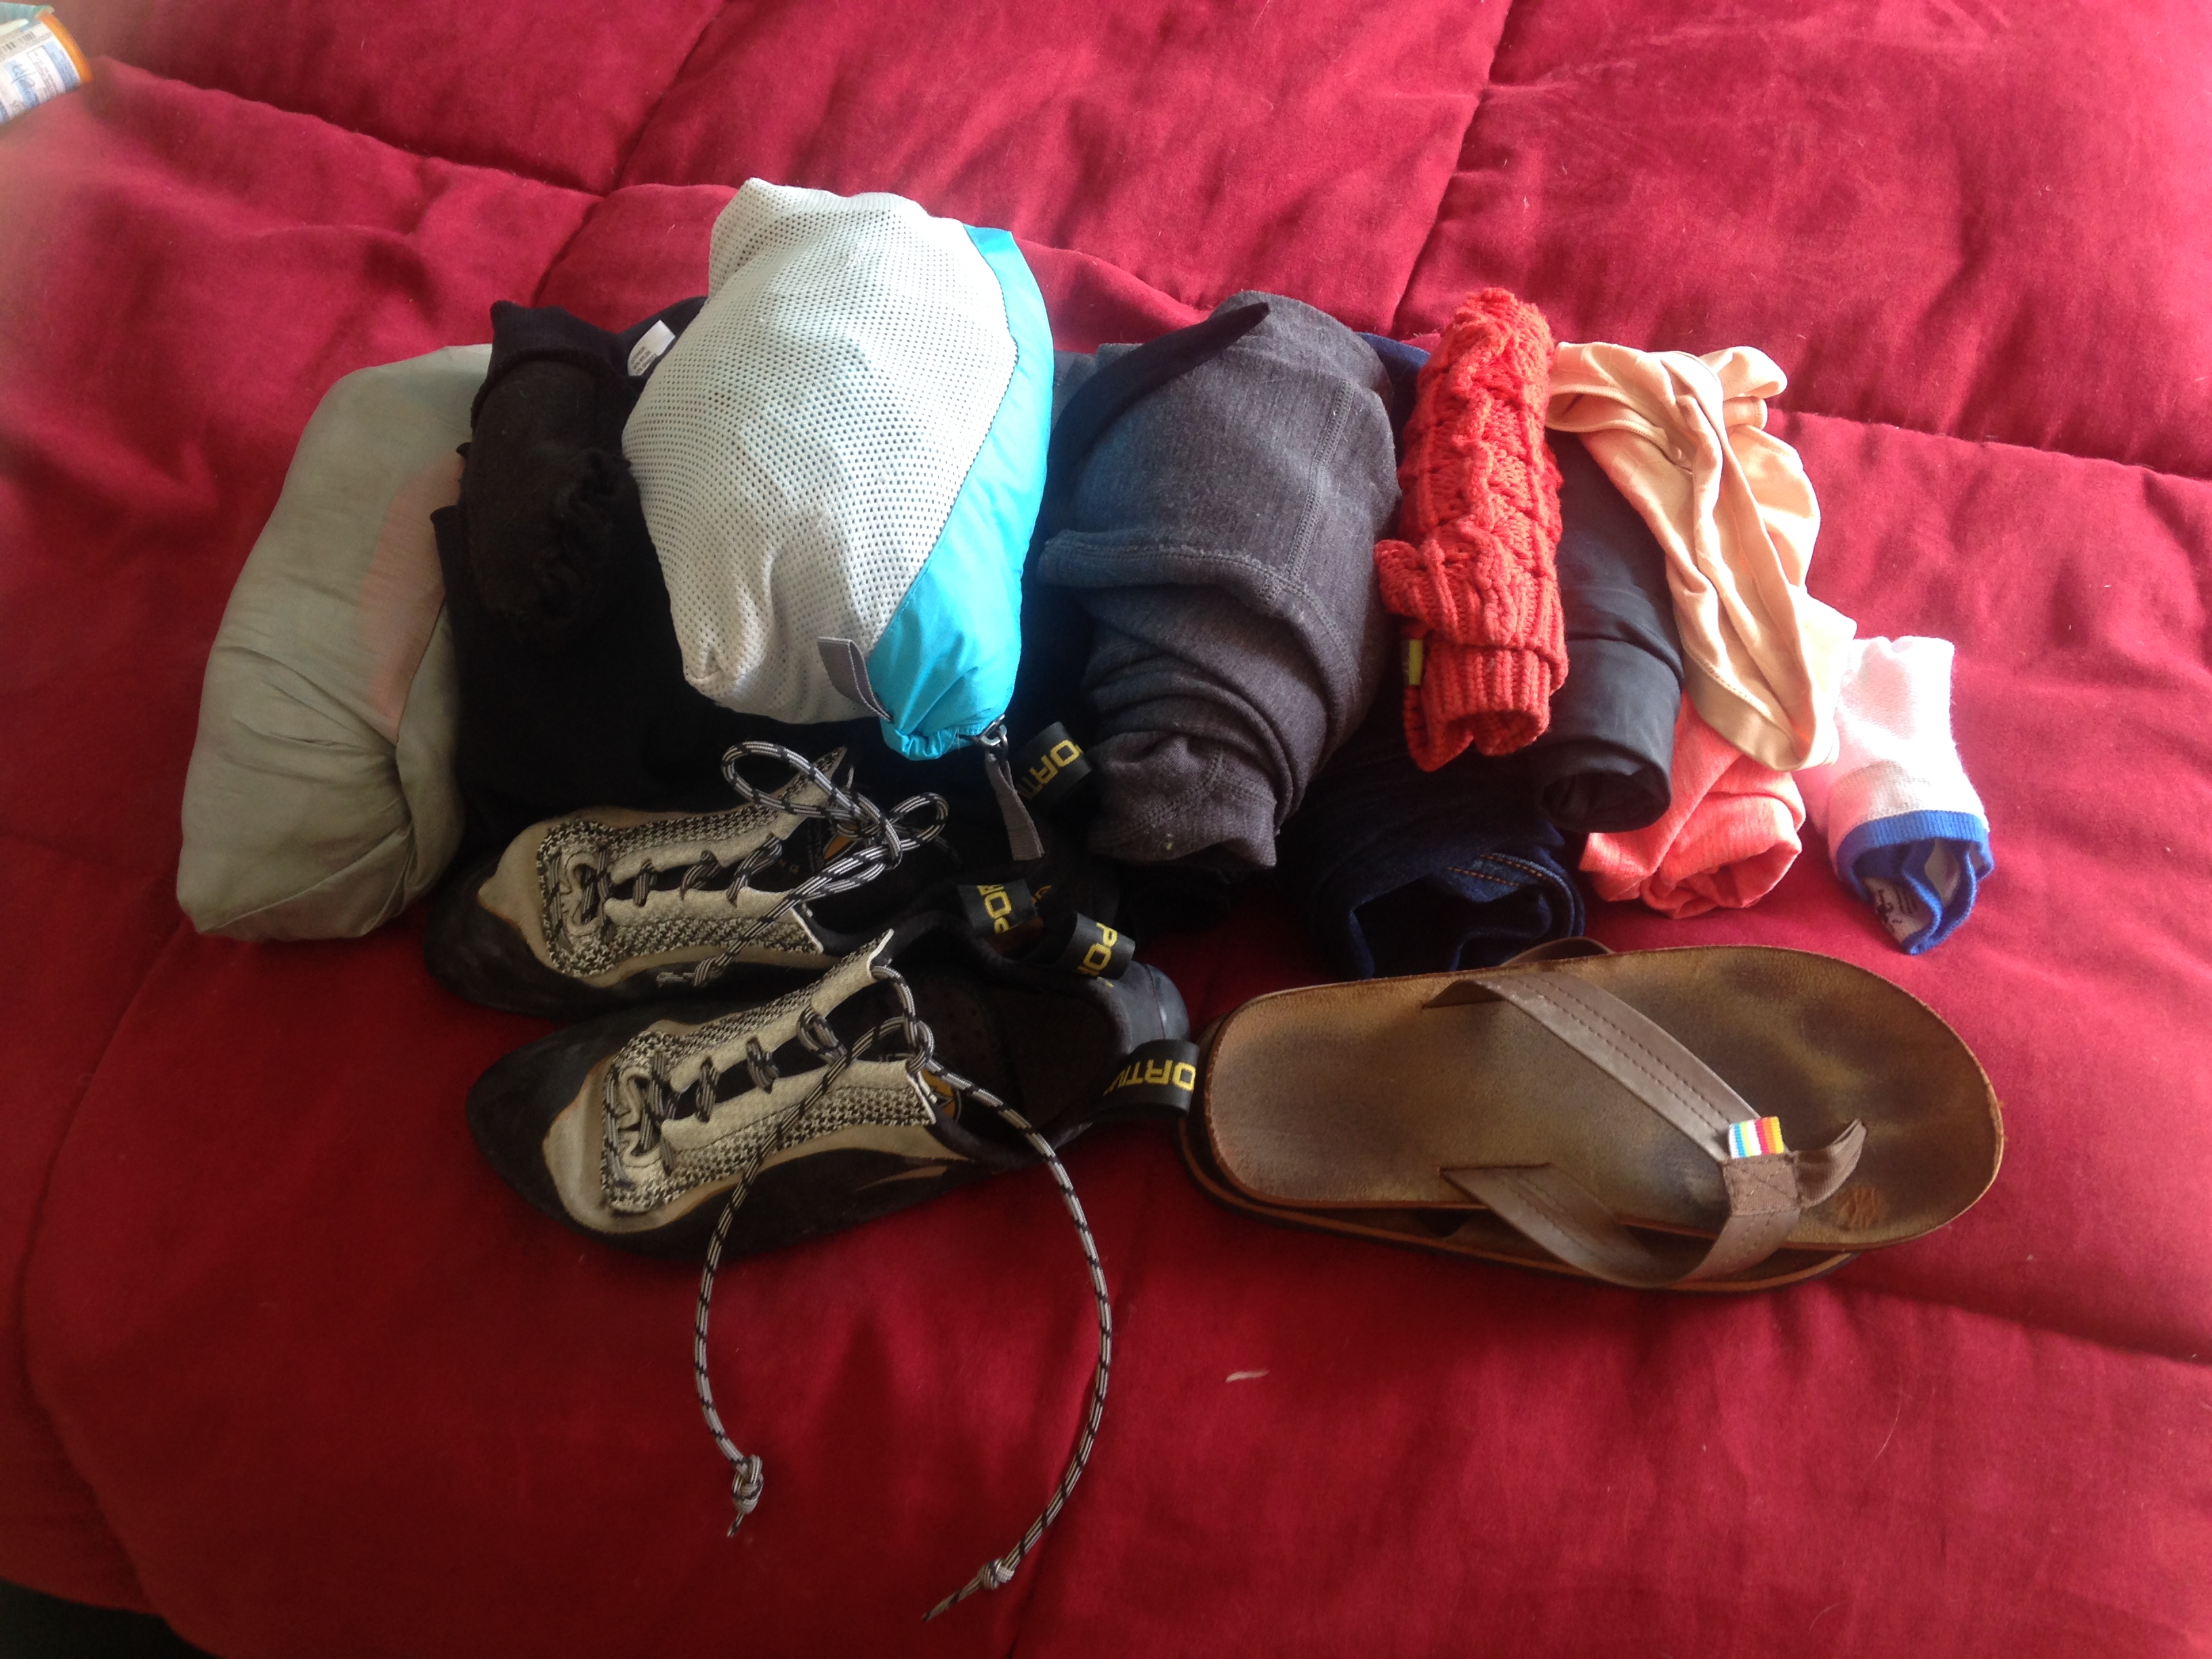
- Footwear– Make sure you have spent significant time in your footwear, (including your socks!), close to home before putting it to work abroad. You want this part of your system to be broken in and especially well-tested.
- 2 pair synthetic or wool (not cotton) socks (Try Darn Tough or Smartwool)
- Shoes. We like approach shoes, which are made specifically for walking to rock climbs and have great rubber bottoms for off-road travel. Our favorites are the Scarpa Cruxes(Amazon) and 5.10 Guide Tennies(Amazon). You could go with any walking shoe with good support, depending on the needs of your trip.
- Light flip flops (good for showering, swimming, etc.) This is one thing you don’t need to spend a lot of cash on, depending on your travel needs.
- Destination-specific clothes- this could include any number of items specific to your trip. For example:
- Swimsuit for floating in the Dead Sea
- Sarong for walking the beach in Panama
- Dress for salsa dancing in Colombia
- Sun shirt to protect yourself from sunburn in Cuba
- Scarf to dress up your outfit in London or cover your head in Jerusalem
- You get the idea
Once you’ve found a system that works for you, you will be amazed at how light your pack can be. The only consequence is that you will be wearing the same outfit in almost every photo. We find that it’s a small price to pay for being able to comfortably carry everything you need on your back in under 10 lbs and half-full 40 liters.
For trip-specific clothing lists, see our posts for Cuba(Amazon) and Panama(Amazon).
For a master packing list and how to use it, click here(Amazon).